
Staining My Cedar Deck with Ready Seal Stain (video)
When you buy through my links, I may earn a commission.
Over a year ago, Chris and I decided to refresh our deck because it was super old and falling apart. Part of it was built in the 1970s when the house was first constructed, and then at some point in the 90s, the previous owner added a sliding glass door in the primary bedroom and extended the deck to run to the end of the house, making it 38 feet long.
Before we bought the house, the previous owner's children had done what I like to call a mini-flip—just enough updates to make the house look more modern and ready to sell. Instead of properly restoring the deck, they just slapped a coat of red, non-penetrating stain over the old, peeling stain—without even sanding first. As you can guess, that didn’t hold up well. The stain started cracking and peeling soon after we moved in. We call that putting lipstick on a pig lol.
Over the next four years, the deck just got worse, and we were concerned that the ledger board was pulling away from the house. That’s when we decided to give it a facelift, reinforcing any weak spots in the structure (which we hired a pro for), and then replacing all the cedar deck boards ourselves.
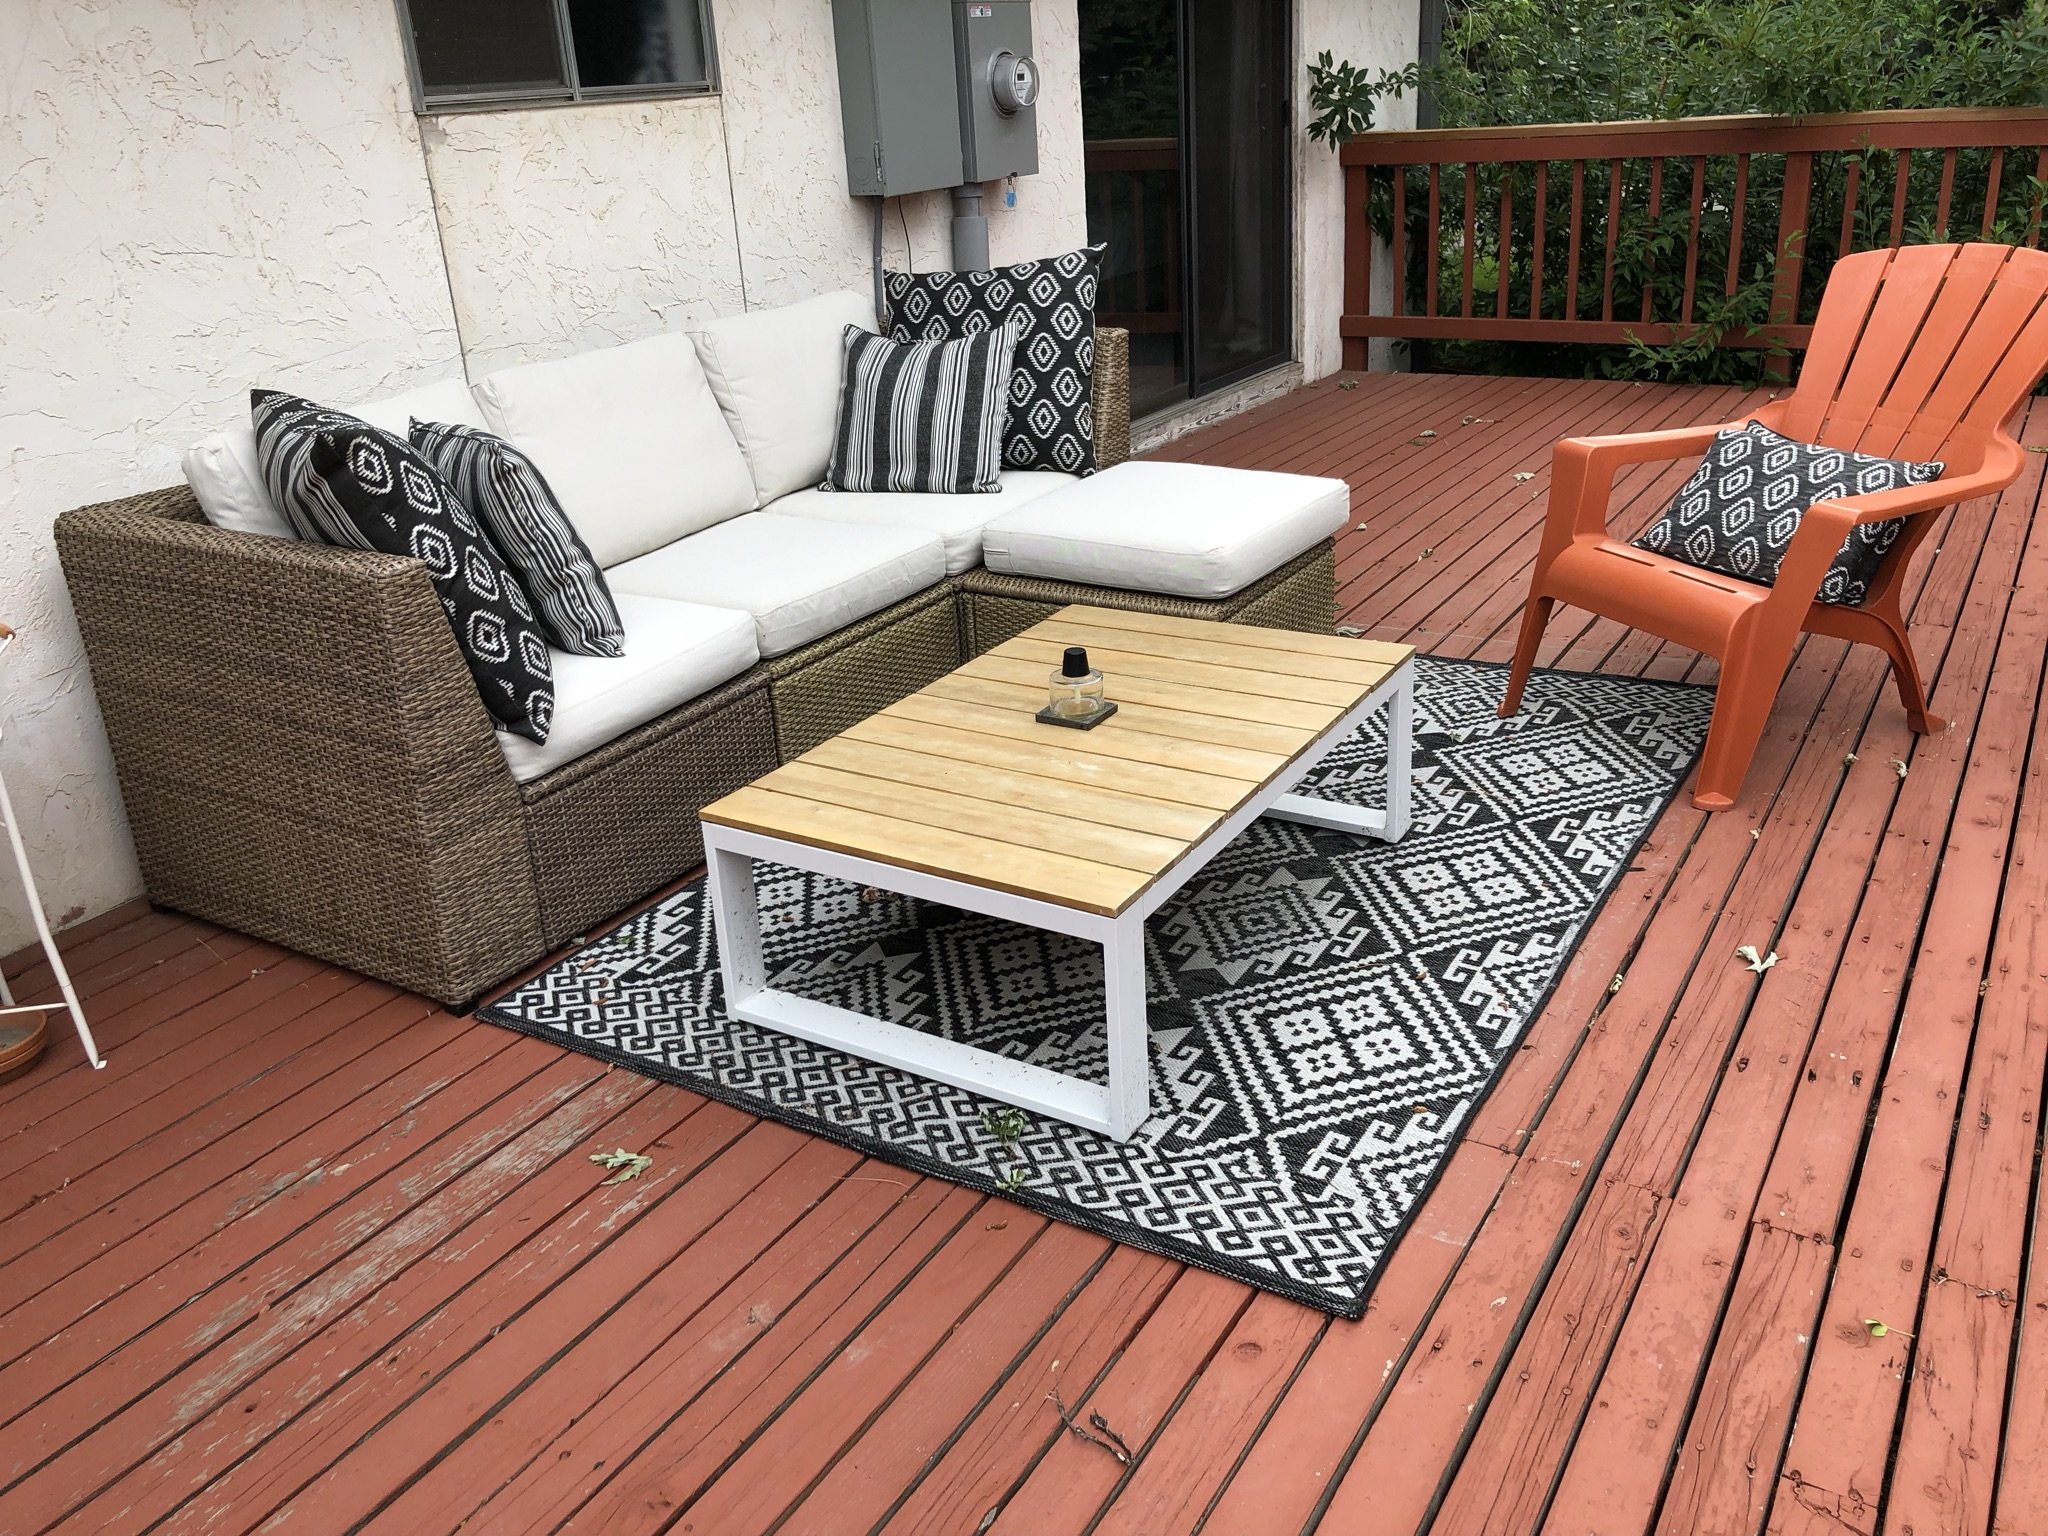
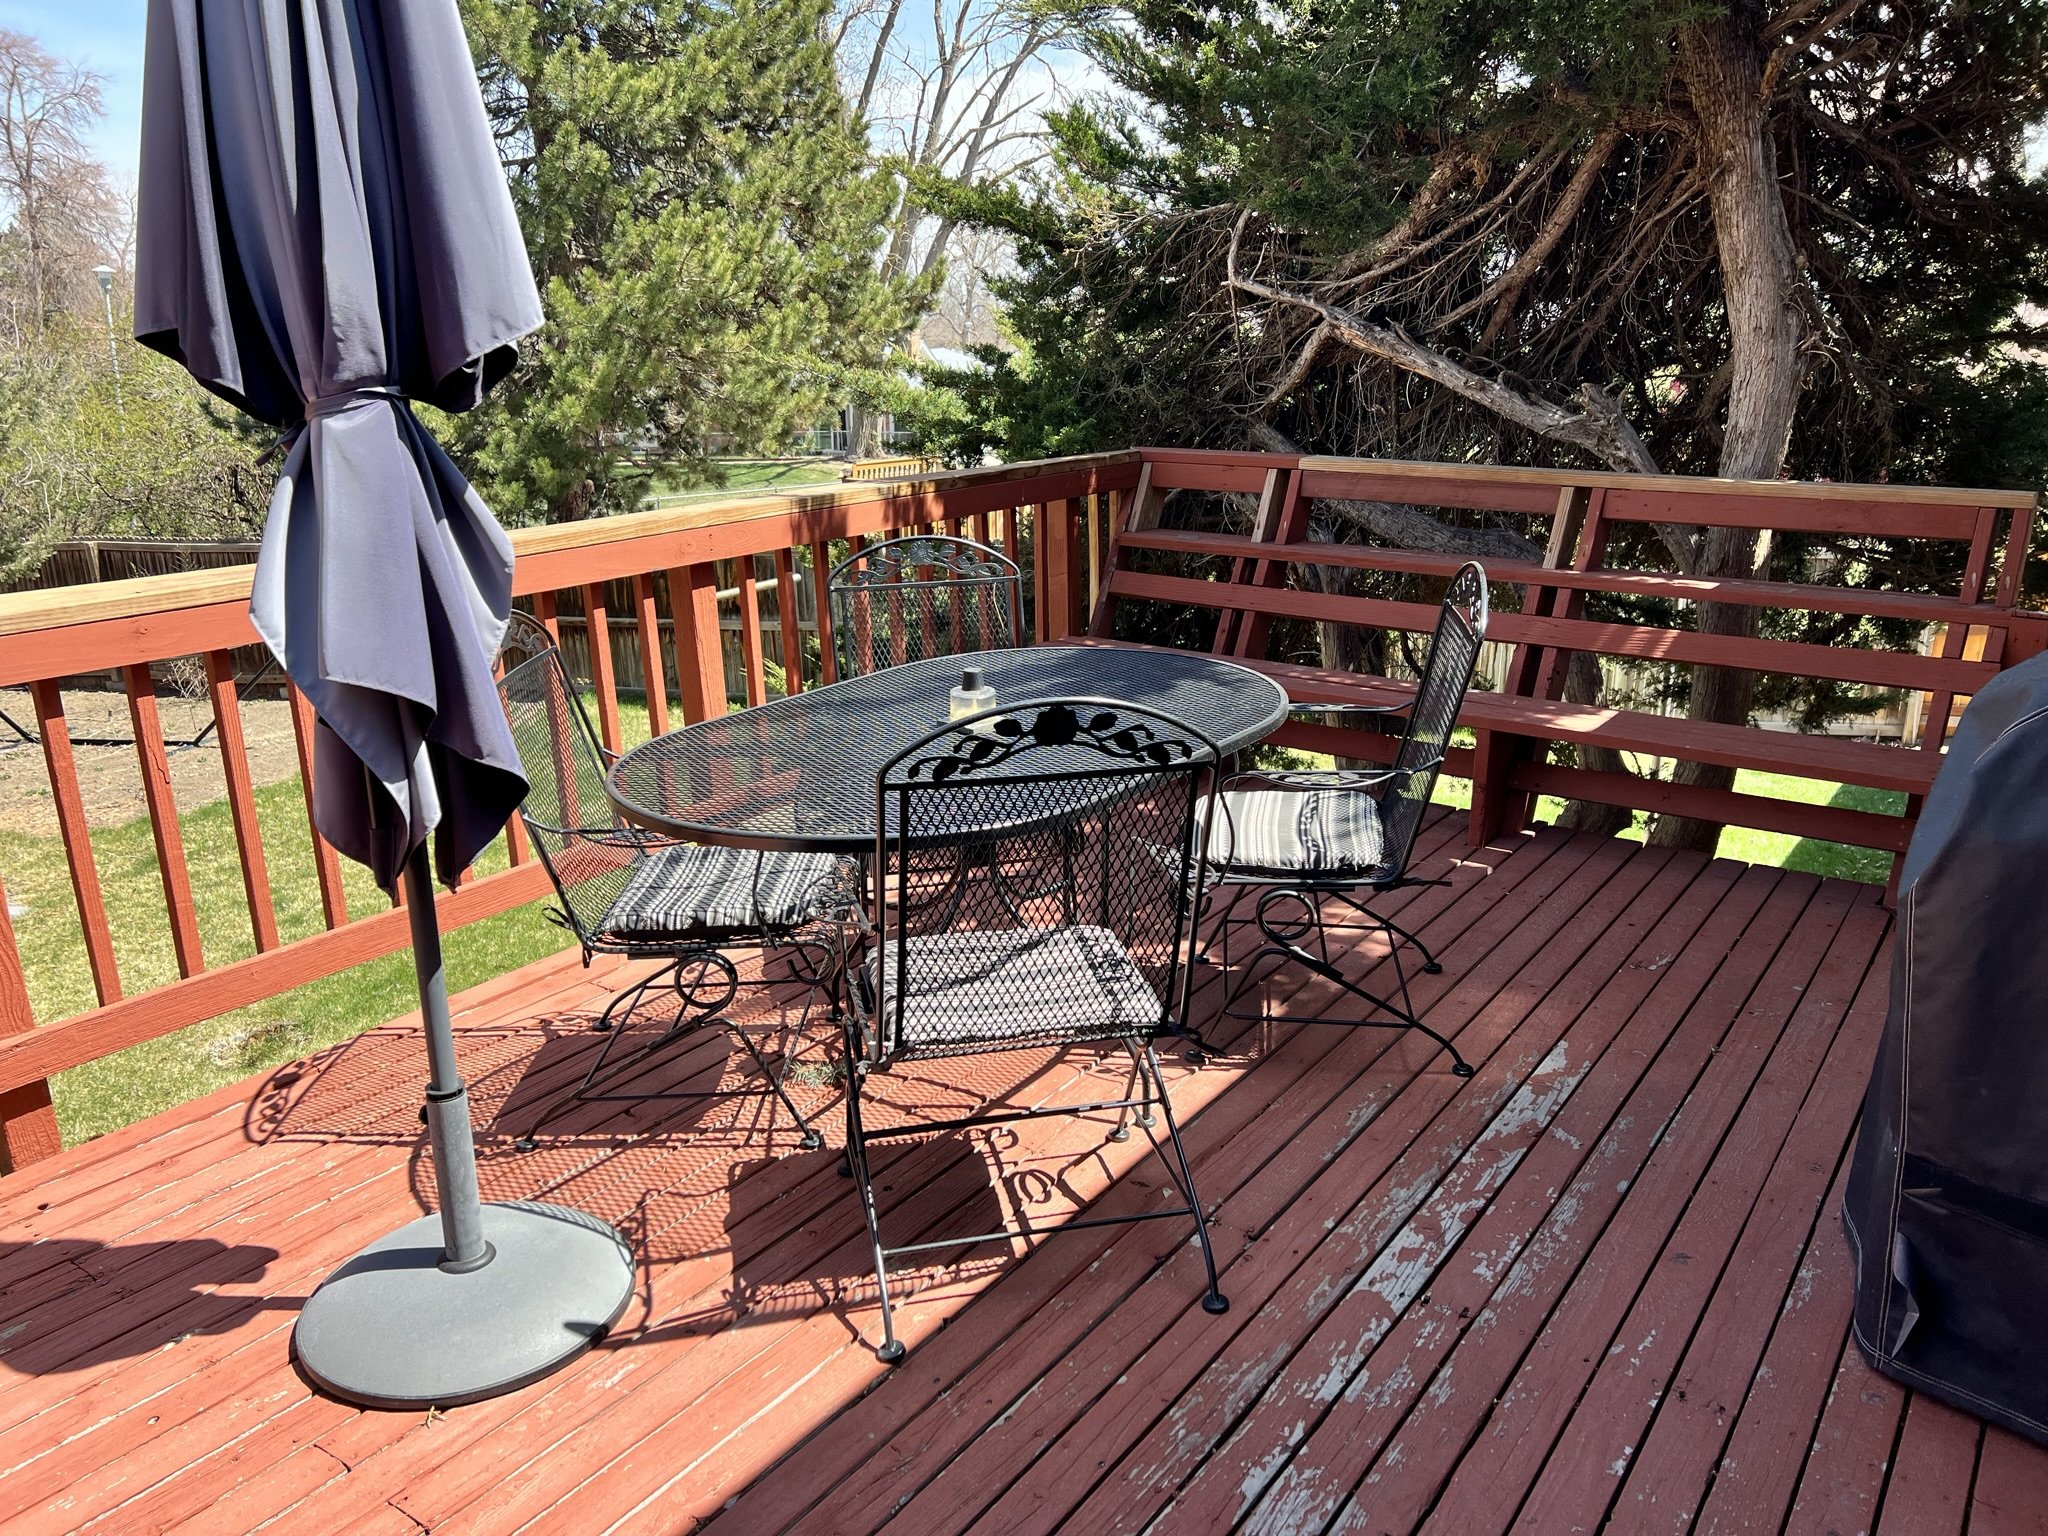
As you can see in the photos below, the old 2x4 deck was looking pretty rough, the paint was chipping off, and the screw holes were even rotting away. When we installed the new cedar deck boards, we used the Camo Marksman Pro hidden screw system, making sure the boards were secure and looked seamless without screw holes that would eventually rot from standing water. Besides just wanting it to look better, we needed it to be safe, especially since we Airbnb our primary bedroom. When the weather is nice, guests love using the deck, so we wanted to make sure it was something we felt confident about and wouldn’t be a liability.
Here is a look at our old deck before the rebuild.
Choosing the Right Stain
With the new cedar deck boards installed, it was time to choose a stain, and I wanted to get it right this time. I went to Ace Hardware and picked up a sample pack of Ready Seal stains so I could test different colors on scrap wood. Not all Ace Hardware stores carry this, so you may want to call ahead to ask. I think I just happened to get lucky. You can order the sample pack from Ready Seal and just pay shipping if your local hardware store doesn’t carry them. One thing to keep in mind is that the samples are very small, and my test pieces didn’t look exactly like the final product color, but it was close enough to give me an idea of the final outcome.
The best match for a natural wood look was Natural Light Oak, which I believe Ready Seal has renamed Natural. This color kept the warm wood tones without pulling much of the red cedar tones. As you can see on their color wheel below, the color Cedar pulls a lot of red. The other color we liked was pecan, which was a little darker but still a natural color without red tones. But we figured we could go lighter in color at first with the natural color, then down the road, when we reapply the stain, we could change it up and go for the warmer pecan color. We bought the 5-gallon bucket of Ready Seal stain from Ace Hardware, but you can also find it on Amazon. I had enough to do one coat of stain on the entire deck, a privacy wall on the deck, and a portion of a new fenc,e with probably at least 1.5-2 gallons left over.

Before deciding on Ready Seal, we also tried C2 Guard stain after watching a RenoVision deck staining video on YouTube recommending it. Unfortunately, it didn’t work well for us. Since we treated the ends of all our cut cedar boards, the C2 Guard stain didn’t penetrate well near those treated edges. I also couldn’t find many online reviews for it, which didn’t give me much confidence. Plus, it wasn’t easy to buy—I would have had to special order it. With Ready Seal, I could get it anytime from Ace Hardware or Amazon, which was a big plus since I knew we’d need to reapply every year or two.

Prepping the Deck
Proper prep is key to making sure the stain applies evenly and lasts. While Ready Seal doesn’t require sanding, we decided to rent a belt sander from Home Depot because we had installed our boards over several months, working nights and weekends. This meant some boards had already started to weather while others were brand new. Sanding helped even everything out so the stain would absorb properly.
Next, we followed Ready Seal’s recommended cleaning protocol for a new, never-stained deck, which was a 25% bleach / 75% water solution to clean the wood. I applied the mixture using a hard-bristle brush, let it sit for 10–15 minutes, and then rinsed it off with a garden hose. Read all of Ready Seal’s protocol here to see what bleach mixture they recommend for the condition of your deck.
Unfortunately, I ended up with a few bleach spots in areas where the mixture wasn’t evenly diluted or where it sat for too long. I called Ready Seal’s customer service (which was fantastic!), and they asked me to email them photos and suggested simply washing those spots again. I did that the next day, and thankfully, the discoloration mostly disappeared, and once I applied the stain, you couldn’t see any trace of the spots.

Making Sure the Wood Was Dry
Since Ready Seal is an oil-based penetrating stain, the wood has to be completely dry before application. The best way to check is with a moisture meter, which Ready Seal recommends. The goal is a moisture content of 12% or less (or up to 14-15% in humid climates).
I didn’t use a wood moisture meter, but I live in Colorado, which has a dry climate, so I felt confident that waiting 48 hours after cleaning was enough. If you’re in a humid area, I’d definitely suggest using a meter to be sure your wood is dry enough before applying stain. We did end up buying a moisture meter when we installed the deck railing because we used Garapa, which is a hardwood, and we wanted to ensure the wood was fully dry before we applied the deck stain.
Applying the Stain
Before getting started, I called Ready Seal’s customer service a couple of times to ask questions, and they were super helpful every time. They recommended using a ¼" paint roller, but after going through the process, I personally would have used a ⅜" roller instead. The ¼" roller didn’t hold much stain, which made the application take longer than necessary. You can also apply the stain with an airless paint sprayer or a garden pump sprayer.
For getting between the deck boards, I used a 5" staining brush attached to a mop/broom handle that I already had. You probably have one lying around, too. This worked really well and made it easier to reach between the boards without having to bend over the whole time.
The application itself was straightforward and took about 1.5 to 2 hours. (You can check out my video here for more details on the process.)
Checking the Stain the Next Day
The next morning, about 24 hours later, I noticed a few spots where the stain looked like it hadn’t fully soaked in. I grabbed an old towel and wiped down those areas since the wood clearly couldn’t absorb any more stain. Ready Seal also states that you can wipe away any residue with Mineral Spirits, and it wouldn’t affect the stain at all.
At first, the color was beautiful, but it looked way darker and redder than I expected, nothing like the stain samples I had tested. But I had read that Ready Seal takes about two weeks to settle in, and sure enough, over the next couple of weeks, the color evened out to the natural wood tone we wanted. If you stain your deck and it looks too dark at first, don’t panic - it will lighten up.

Natural Light Oak Ready Seal Stain after application
One Coat vs. Two Coats of Ready Seal
One important thing to know: New wood can only take one coat of stain. New smooth-milled deck boards have a mill glaze that makes them less porous, preventing them from absorbing a second coat. Ready Seal is designed to soak into the wood, not sit on top like paint, so if the wood can’t absorb more stain, adding another coat will just leave excess product on the surface.
If you’re unsure whether your deck can handle a second coat, here’s a quick test from Ready Seal:
After the first coat dries for one hour, apply a few drops of stain in a test area.
Let it sit for 30-45 minutes.
Wipe it with a paper towel or your fingers.
If you see no color or just clear oil, the wood absorbed the stain and you can do a light second coat.
If you see color/pigment on the surface, the wood can’t absorb more stain, and you should wait at least a year before applying another coat.
Since our deck boards were new cedar, we only did one coat. Over time, as the wood weathers and becomes more absorbent, we’ll be able to add more stain during future maintenance. I expect to do so every 1-2 years. I knew that going in to the project and am ok with having to reapply
Drying Time & Rain Protection
Ready Seal is super forgiving, they call it Goof Proof! It’s rain-safe within 2-4 hours, meaning if a storm rolls in, you don’t have to worry about it washing off. However, it takes 48-72 hours to dry and 14 days to fully cure. It’s best to avoid a lot of walking on it for at least a day, especially because the bottoms of your shoes will feel oily. We kept an old towel inside the kitchen door to wipe our feet for several days until it was fully dry.
As you can see here, a few days after applying Ready Seal that the deck is protected and the rain is sitting on top of the deck instead of absorbing into the wood.

Below is a great example of the color contrast between cedar deck boards without stain, the deck boards 2 months after application, and our privacy wall 1 week after application. This is a photo taken while we built a deck privacy wall to give us a little privacy from the neighbor next door and a people walking on the public sidewalk between our houses.


The deck privacy wall built with cedar decking and stained with Ready Seal
After all the work we put into rebuilding and staining the deck, we couldn’t be happier with how it turned out. The Ready Seal Natural stain gave us exactly the look we wanted—a warm, natural wood tone without any harsh red hues. It’s holding up beautifully, and we love knowing the deck is now both safe and great-looking. We had to pause the build for the last couple of winter months, but we will be resuming the last section of the privacy wall build and then finishing the deck posts and hand railing with black Muzata cable railing.
We also loved this stain so much that we used it on a small section of cedar fencing as well, and I’ll be sharing more about that project soon. Stay tuned!
Let me know if I can answer any questions in the comment or find me on TikTok and tag me with the results of your project!